
Hellooo!! As there's a cloudy, cold and rainy weekend ahead, today I show you an easy DIY I've made for my home that you can try at yours ;) . I had been searching for a key box for a long long time to keep all the keys together, but I didn't find anyone in the style and color I wanted, so I decided to customize an old one keeping its vintage style but giving it a modern refresh :)
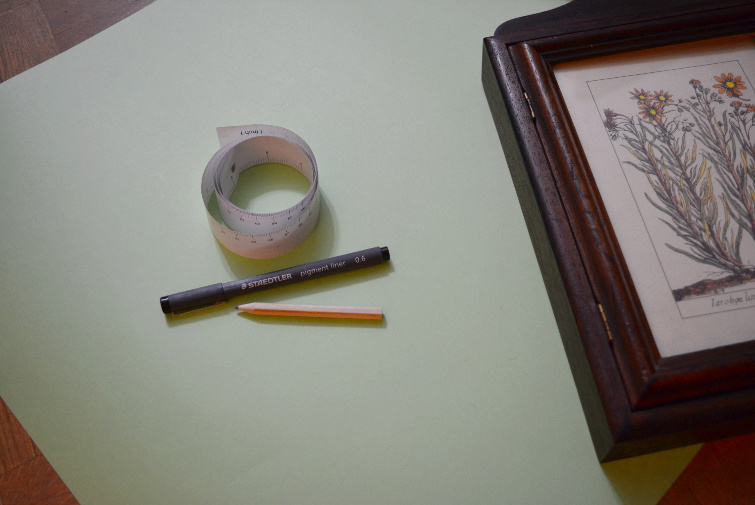
The first thing you need for this DIY is an old key box and the following materials that you can find on any stationery shop: a cardboard in the color you choose, a rule, a pencil, an isograph pen, a rubber and a pair of scissors (sorry I forgot to include these last two in the picture! :P)
Holaaa!! Como se avecina un finde gris, frío y lluvioso, hoy os enseño un sencillo DIY que hice para casa y que podéis probar a hacer en la vuestra ;) . Llevaba mucho mucho tiempo buscando una caja para guardar las llaves para tenerlas todas juntas, pero no encontraba ninguna en el estilo y color que quería, así que decidí personalizar una antigua conservando su esencia vintage pero dándole un aire un poco más moderno.
Lo primero que necesitas para este DIY es una caja de llaves antiguas y estos materiales que puedes encontrar en cualquier papelería: una cartulina del color que elijas, una regla, un lápiz, un rotulador estilográfico, una goma de borrar y un par de tijeras (¡perdón que se me olvidó incluirl estas dos últimas en la foto! :P)
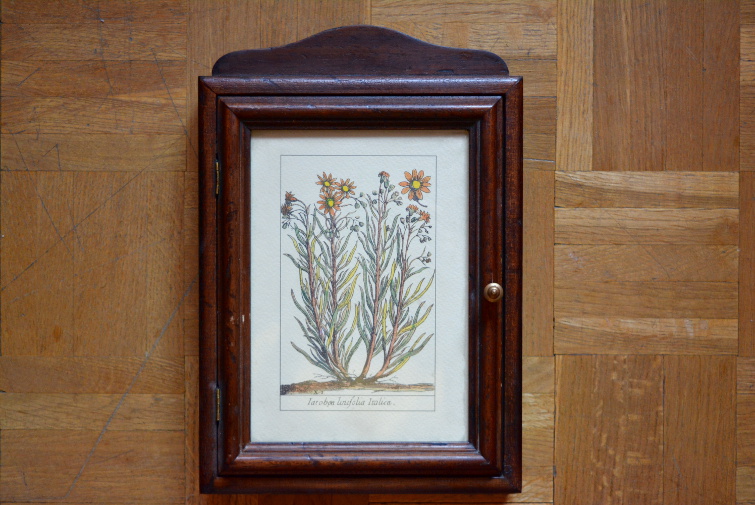
I found by chance this beautiful key box at a flea market, but I didn't like so much its drawing, too classic for me, so I took it as a real bargain to customize it at home.
Yo encontré de casualidad esta bonita caja de llaves en un rastro, pero no me gustaba mucho su dibujo, demasiado clásico para mi gusto, así que me la llevé por un precio de risa para personalizarla en casa.
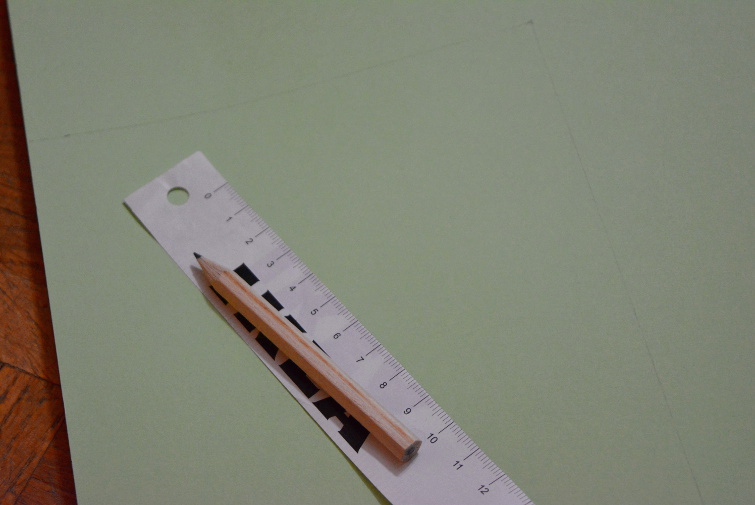
The first step is taking the masures of the frame in the back of the cover with the rule and then place them in the cardboard with the pencil.
El primer paso es tomar las medidas del marco de la parte trasera de la tapa con la regla y plasmarlas en la cartulina con el lápiz.

Next we cut the cardboard following the marks we've made with the pencil and the rule.
A continuación recortamos la cartulina siguiendo las marcas que hemos hecho con el lápiz y la regla.

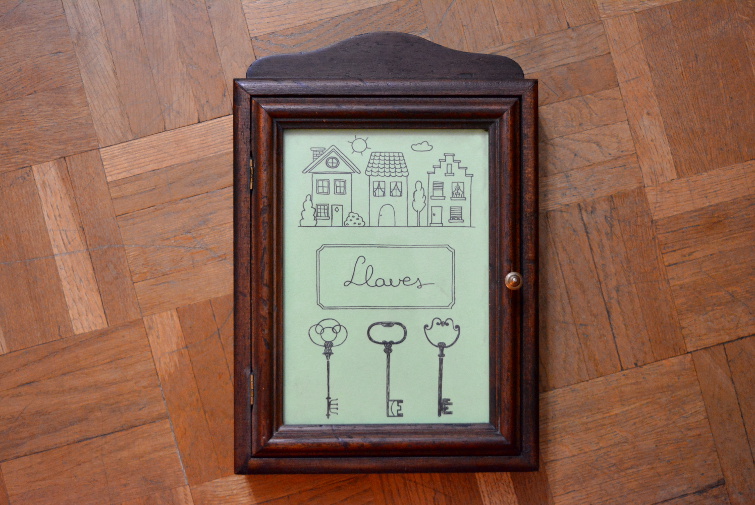
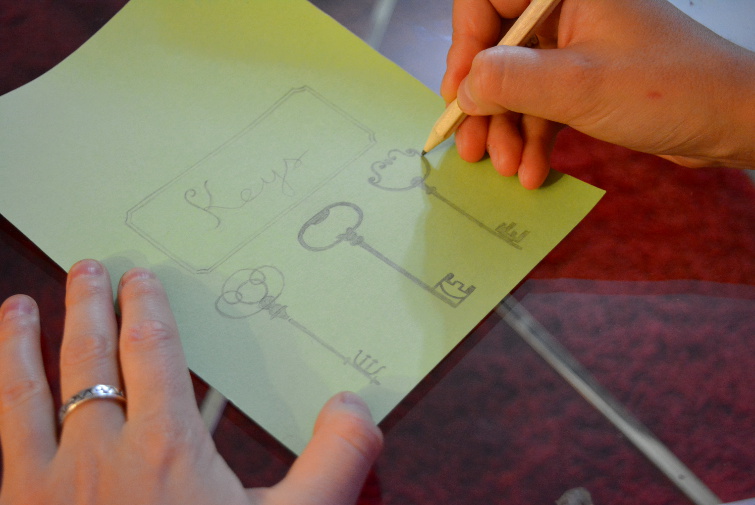
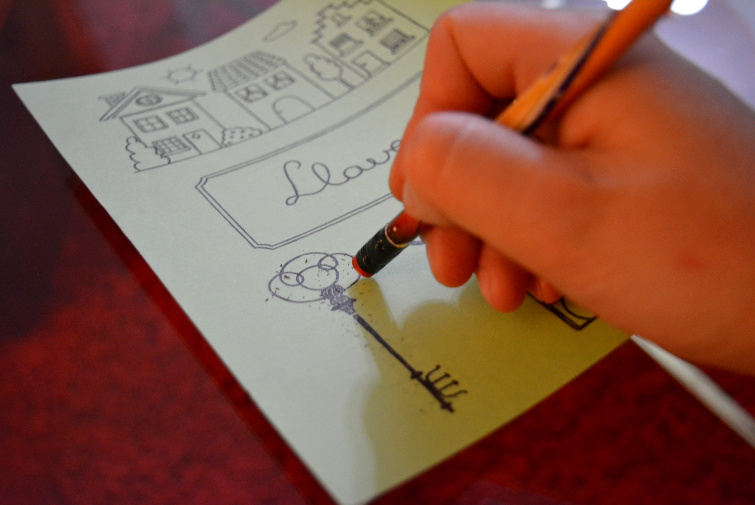
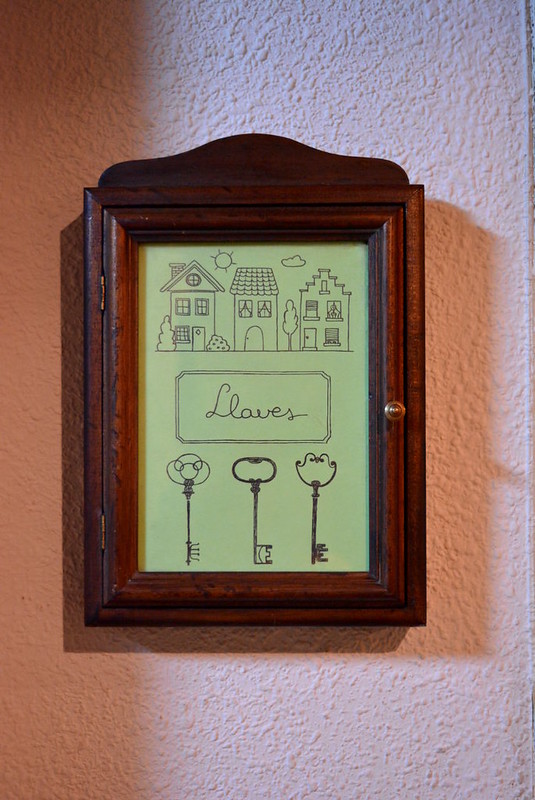
The next step is the most creative one! hehehe. We make a drawing we like in the front of the cardboard with the pencil. As it's for a key box, I chose to draw a set of three houses and three keys in an old style and I also added a word in the center to indicate what this box is for. In the first pictures you see I wrote "Keys" but in the end I changed it for "Llaves", which is the same word in spanish ;)
El siguiente paso es el más creativo! jejejje. Hacemos un dibujo en la cartulina con el lápiz. Como es para una caja de llaves, yo decidí dibujar un conjunto de tres casas y tres llaves de estilo antiguo y añadí también una palabra en el medio para indicar para qué está destinada la caja. En las primeras fotos podéis ver que puse "Keys" pero al final lo cambié por "Llaves", en castellano ;)
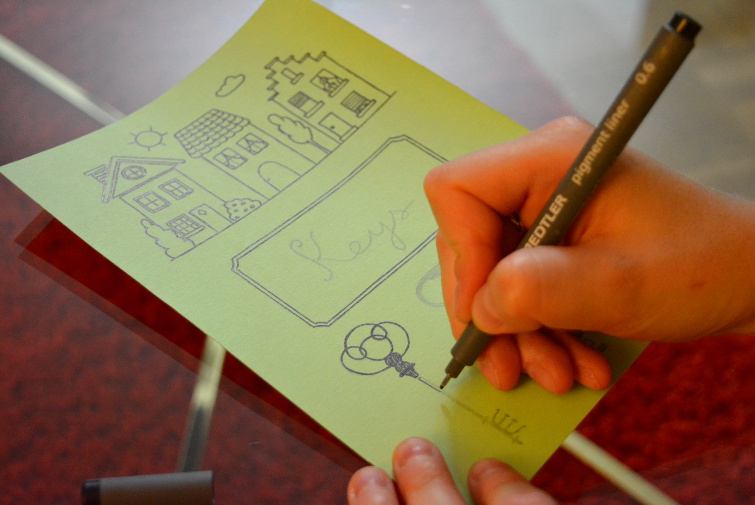
Once we've finish the drawing with the pencil, we fix it with the isograph pen.
Una vez que hayamos terminado de dibujar con el lápiz, perfilamos y fijamos el dibujo con el rotulador estilográfico.
Then we delete the pencil marks with a rubber.
A continuación borramos las marcas del lápiz con una goma de borrar.
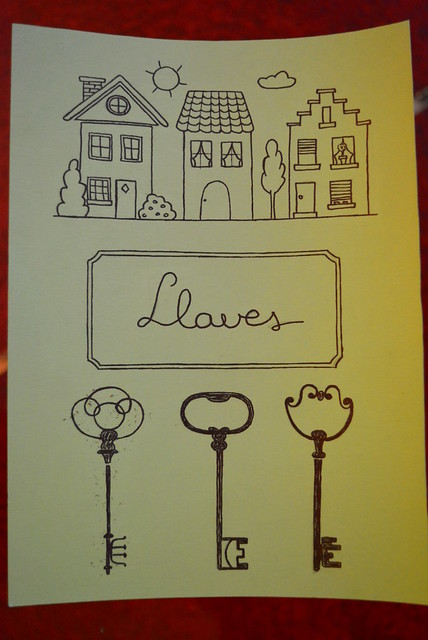
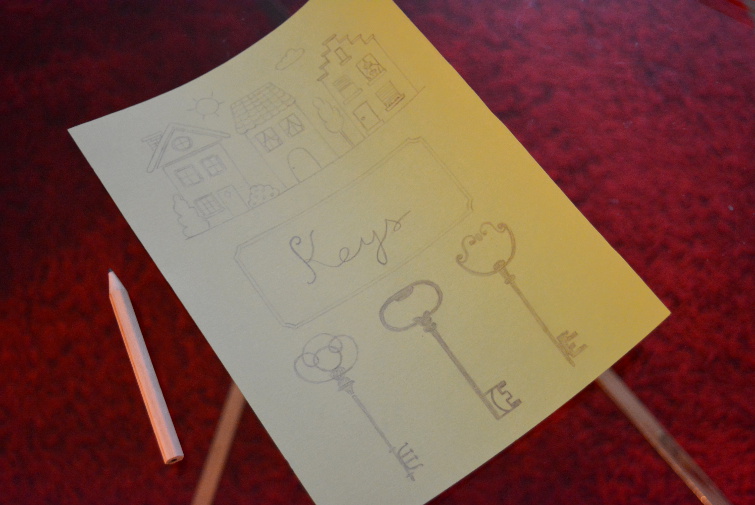
Et voilà! Here we have the finished drawing! :)
Et voilà! Aquí tenemos nuestro dibujo terminado! :)

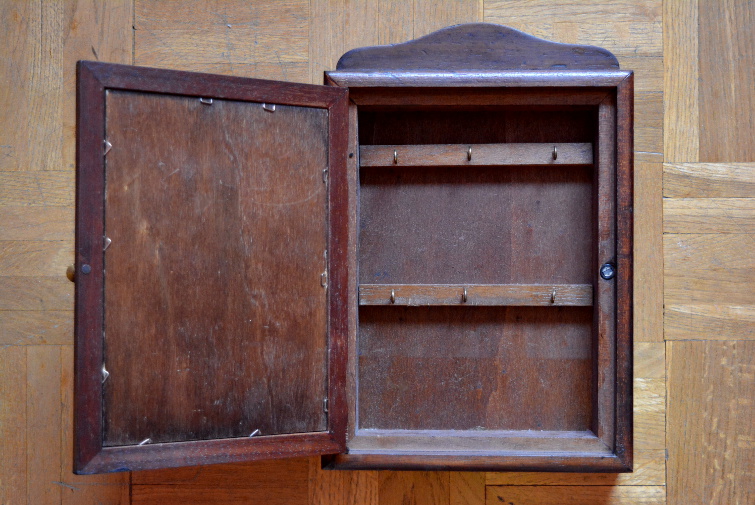
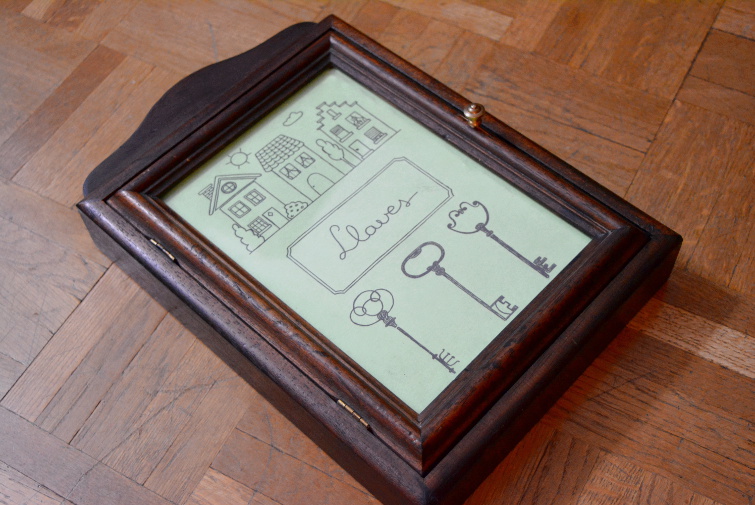
Now we put the cardboard with the drawing on the frame placed on the cover of the key box. In my case this was the most complicated part because the staples were very very very rigid and it took me a lot of time to open it without damaging the box! :P
Ahora colocamos la cartulina con el dibujo en el marco situado en la tapa de la caja de llaves. Aunque parece fácil, en mi caso ésta fua la parte más complicada porque las presillas del marco estaban muy muy muy rígidas y ¡me costó un montón abrirla sin fastidiar la caja! :P
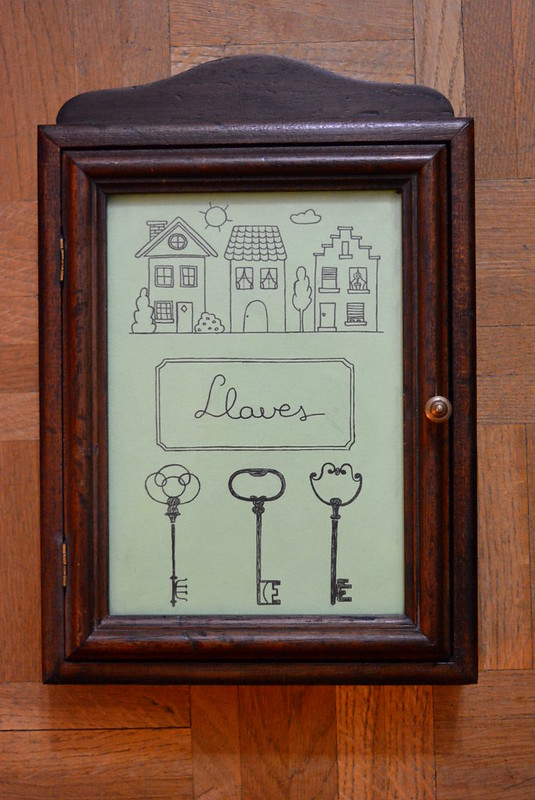
Finally we just need to hang our new customized key box on the wall and that's it! :D What do you think about the result? Did you like this DIY? Would you like me to show you more ideas of easy DIYs for home? Thanks for reading and have a nice weekend!! :)
Por último sólo tenemos que colgar nuestra nueva caja de llaves personalizada en la pared ¡y listo! :D ¿Qué os parece el resultado? ¿Os ha gustado este DIY? ¿Os gustaría que os enseñara más ideas de DIYs sencillos para casa? Muchas gracias por leerme y que tengáis un finde genial! :)
Me ha encantado este DIY . El resultado una chulada .
ResponderEliminarMuchas gracias Carmen!! Me alegro mucho! :D
EliminarAmazing idea! :) And great job!
ResponderEliminarvisit me soon on
http://pearlinfashion.blogspot.com
Thank you so much sweetie!! I really appreciate your words! :)
EliminarGreat DIY. :)
ResponderEliminar∆Mój blog∆ klik
Thank you so much Oliwia!! I'm glad that you liked it! :)
Eliminarwow such a great idea dear ! I love it :)
ResponderEliminarThank you so much Dainté! I'm so happy that you liked it! :) I'll show you more easy DIY ideas soon! ;)
EliminarThis is a gorgeous DIY!
ResponderEliminarWould you like to follow each other on GFC?
http://everythingthatclicks.blogspot.com
I am following you back :)
ResponderEliminarTe quedo precioso, una idea muy original lo de personalizar la caja. Besos
ResponderEliminarMuchas gracias Lola!! :D Me alegra mucho que te haya gustado! :)
Eliminar