
Another one of my hobbies apart from fashion, is doing hand-made things. When I was a little girl, I loved to spend the days or the afternoons doing my own DIYs: bracelets and necklaces, things for my room or to play and even clothes for my dolls! hehe ;) . Now I have less time but from now to then, when I manage to make some time, I turn to DIYs to get some things that I don't find on the stores or al least the way I want them. And that's exactly what happened with this DIY that I show you today.
I live in an old flat and we have a second bathroom that we didn't use very much because it was smaller that the main one and also not very welcoming. Refurbishing was not an option so I wanted to do some changes on it to make it more comfortable and welcoming. The first thing I wanted to change was the old mirror, but I didn't find any other one on the stores which fitted the space available between the shelf over the sink and the lamp over it and which had a young and fresh style. So I decided to customize the old mirror and turn it into a new coloured up one! :) Want to know how I did it? It's quite simple so keep reading! ;)
Otra de mis aficiones además de la moda, es hacer manualidades. De niña me encantaba pasarme los días y las tardes haciendo cosas con las manos: pulseras y collares, cosas para mi habitación o para jugar e incluso ropa para mis muñecas! jeje ;) . Ahora tengo menos tiempo pero de vez en cuando, cuando consigo sacar algo de tiempo, recurro a los DIYs par hacer cosas que no encuentro en las tiendas o al menos del modo en que las quiero. Y eso es exactamente lo que ocurrió con este DIY que os enseño hoy.
Vivo en un piso antiguo y tenemos un segundo baño que no usábamos mucho porque es más pequeño que el principal y además no era muy acogedor. Reformarlo no era una opción así que quería hacer algunos cambios en él para hacerlo más cómodo y acogedor. Lo primero que quería cambiar era el viejo espejo, pero no encontraba ninguno en las tiendas que se adaptara al hueco disponible entre el lavabo y la luz que está encima y que tuviera un estilo fresco y juvenil. Así que decidí personalizar el antiguo espejo y convertirlo en uno nuevo con colorido! :) ¿Queréis saber cómo lo hice? Es bastante sencillo así que seguid leyendo! ;)
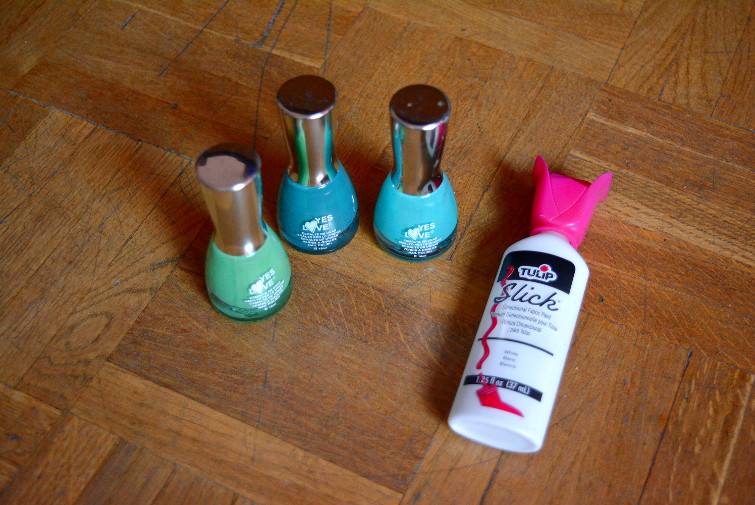
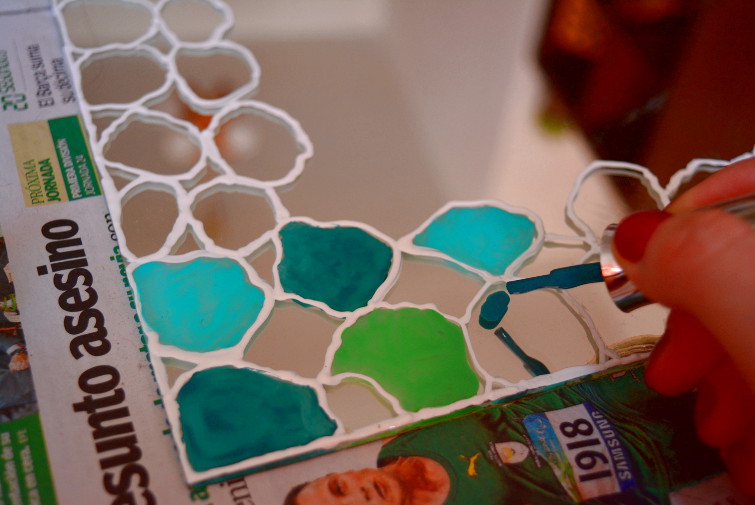
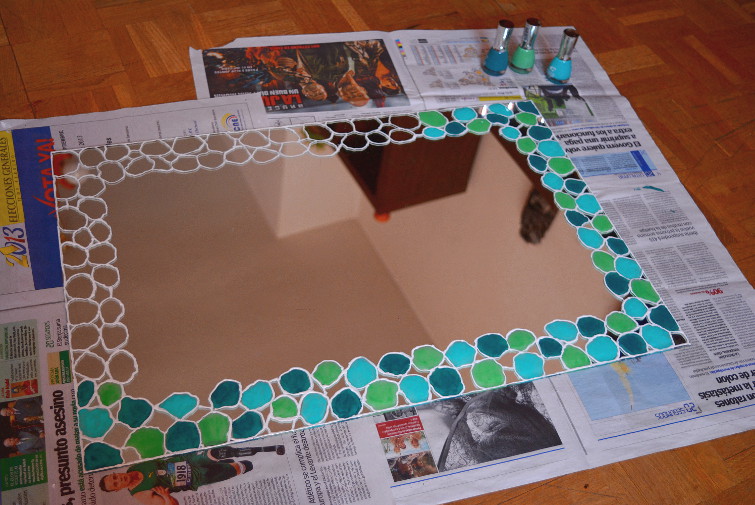
First of all, this is what we need: nail polish in different colors (I chose three in sea green shades) and lead paint or dimensional fabric paint, which is available in more colors and which I used in this occasion.
En primer lugar, ésto es lo que necesitamos: esmalte de uñas en diferentes colores (yo escogí tres en tonos aguamar) y pintura de plomo o en su lugar, pintura dimensional para telas, que está disponible en más colores y que es lo que utilicé yo en este caso.
Then, these are the steps to follow:
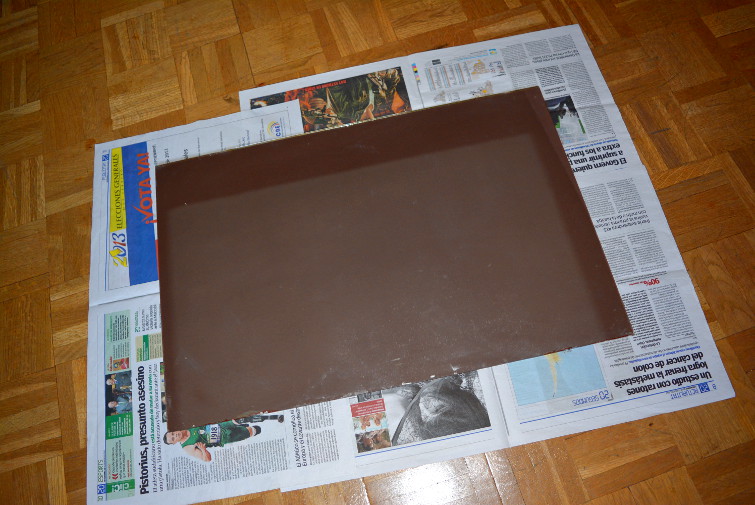
1- Place the mirror on a steady surface. I recommend to use newspapers to protect it from being rubbed and to avoid it to slip up.
A continuación, éstos son los pasos a seguir:
1- Colocar el espejo en una superficie estable. Yo recomiendo utilizar papel de periódico para protegerlo y evitar que se roce.
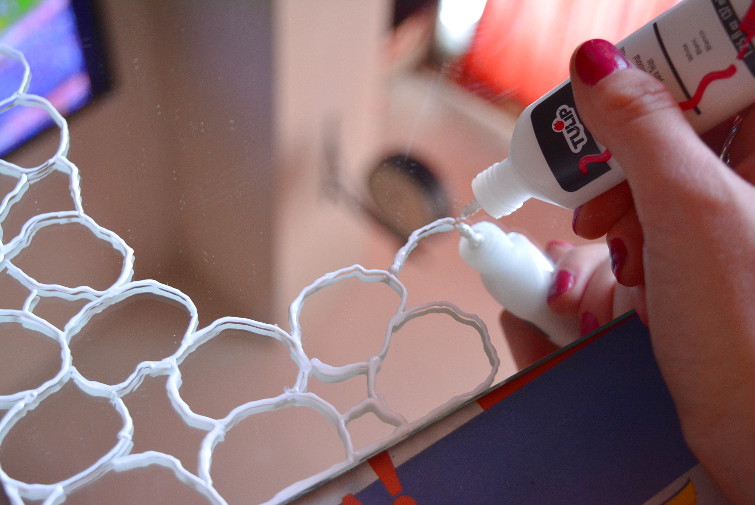
2- Draw the lines of each piece of the the stained glass.
2- Dibujar las líneas de cada pieza de la vidriera.
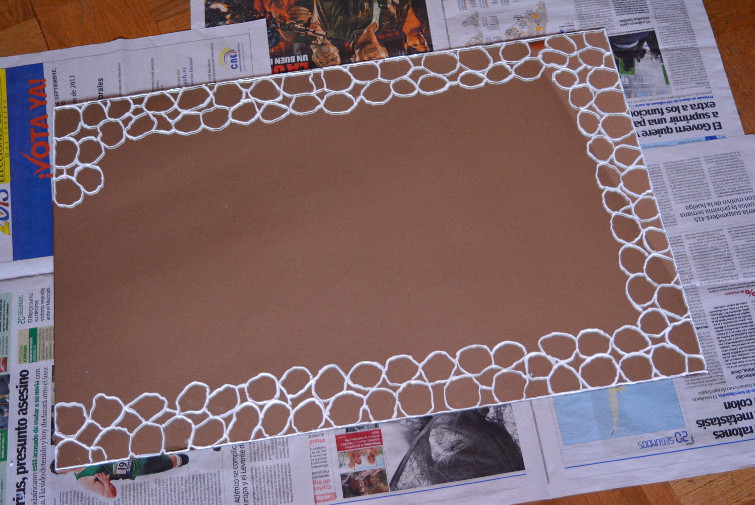
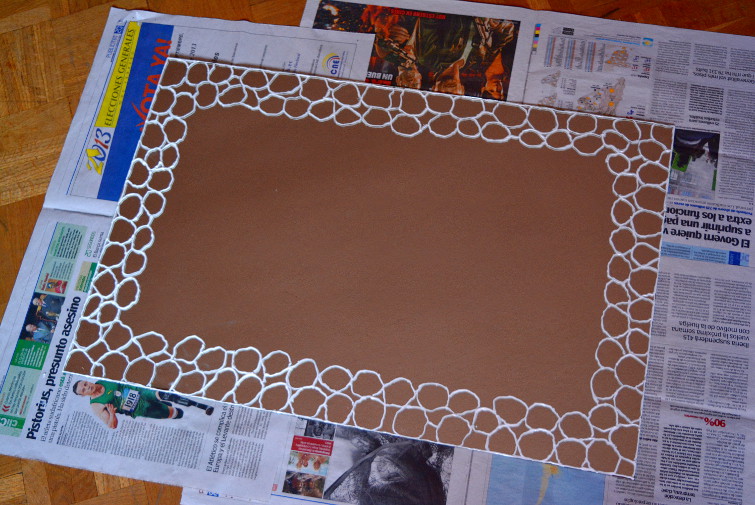
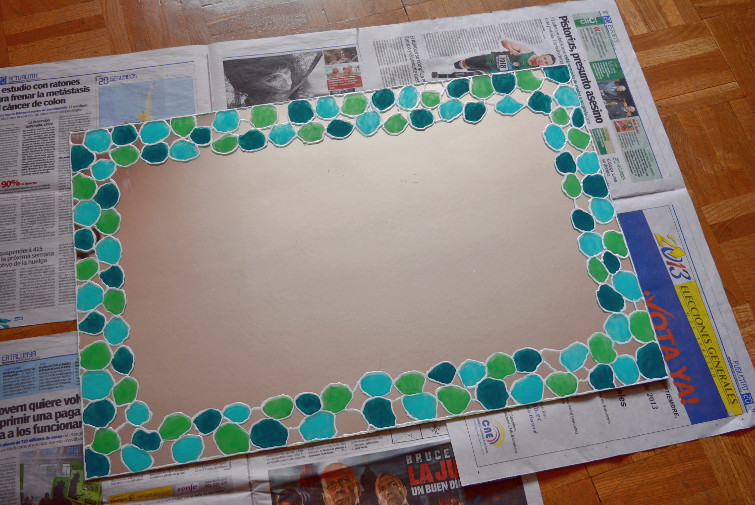
3- Fill up all the pieces of the stained glass mirror with the nail polish. The key is to leave the small pieces uncoloured and try not to get paint adjacent pieces filled with the same color.
3- Rellenar cada pieza de la vidriera que hemos dibujado con los esmaltes de uñas. La clave es dejar las piezas pequeñas sin colorear y procurar no pintar dos celdas adyacentes con el mismo color.
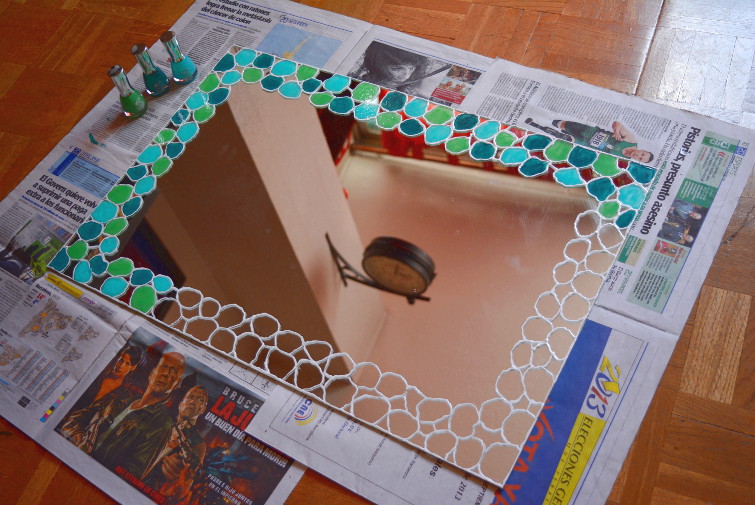
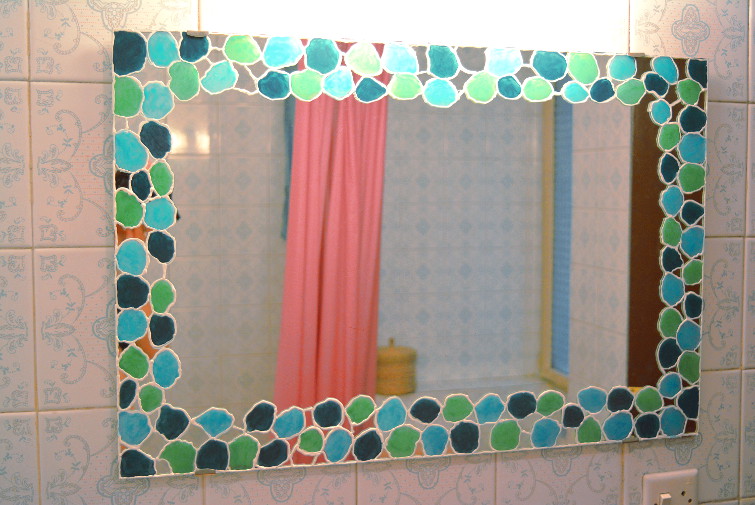
Et voilà! Here it is our old mirror turned into a new coloured up mirror!
Et voilà!Aquí tenemos nuestro viejo espejo reconvertido en uno nuevo lleno de colorido!
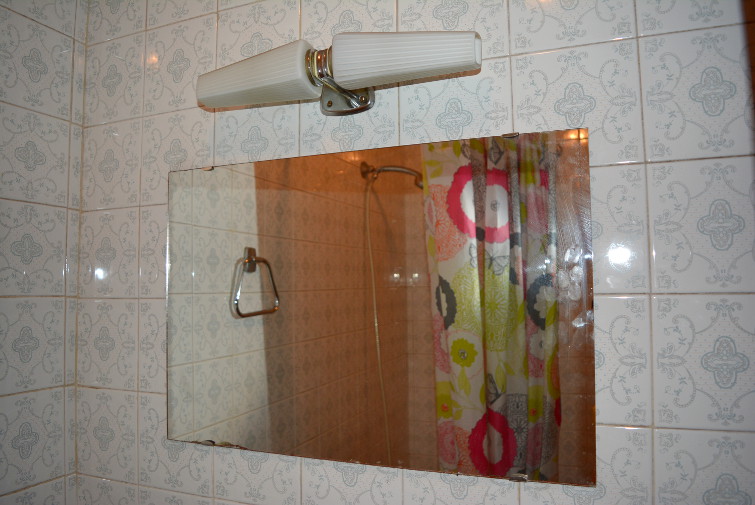
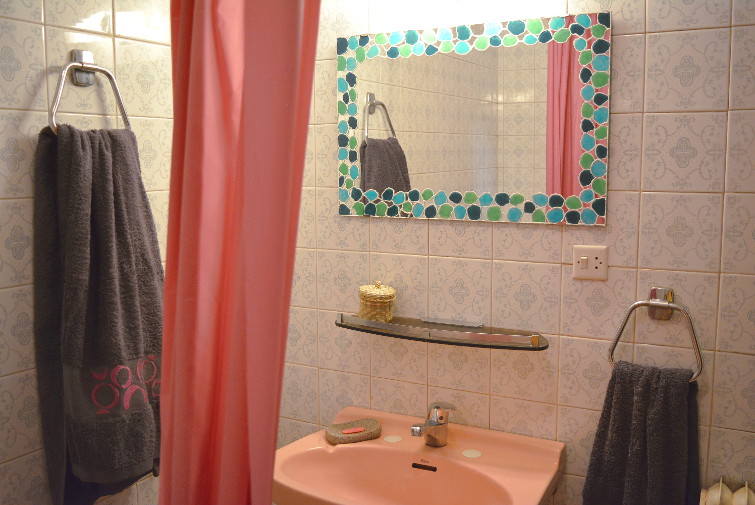
BEFORE:
Here it is the "before image" of out bathroom with the original old mirror:
ANTES:
Aquí ésta es la imagen del "antes" de nuestro baño con el espejo viejo original:
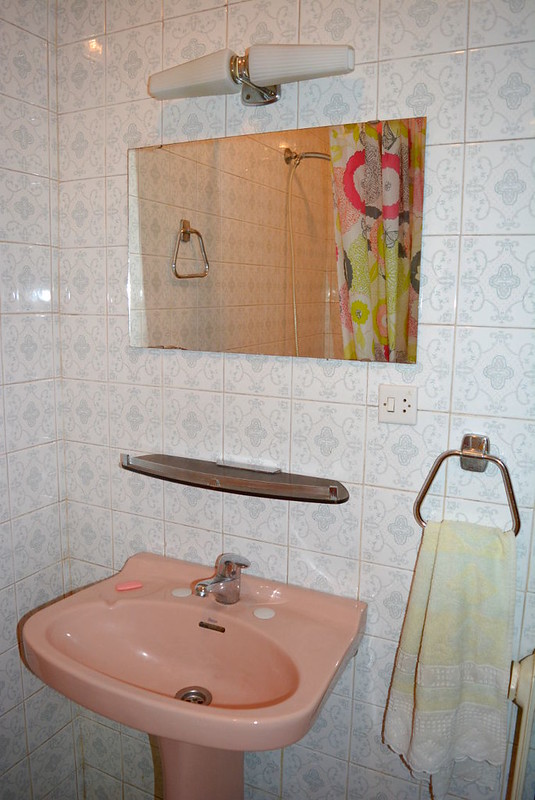
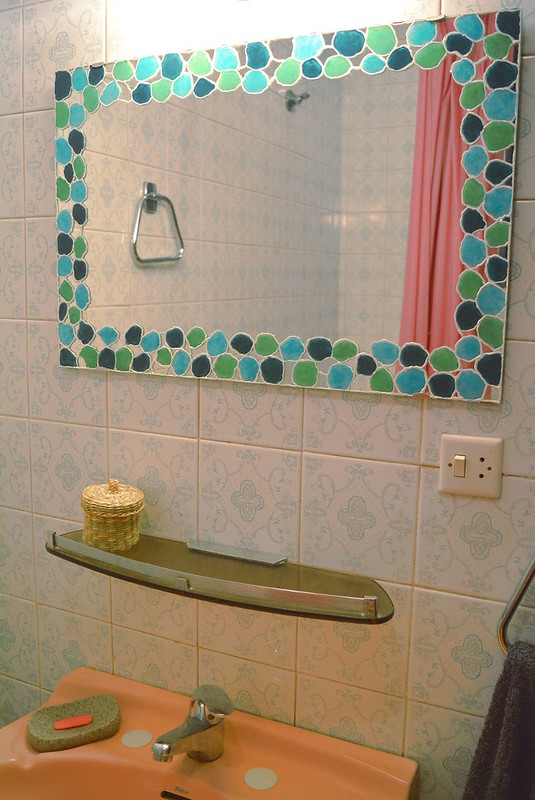
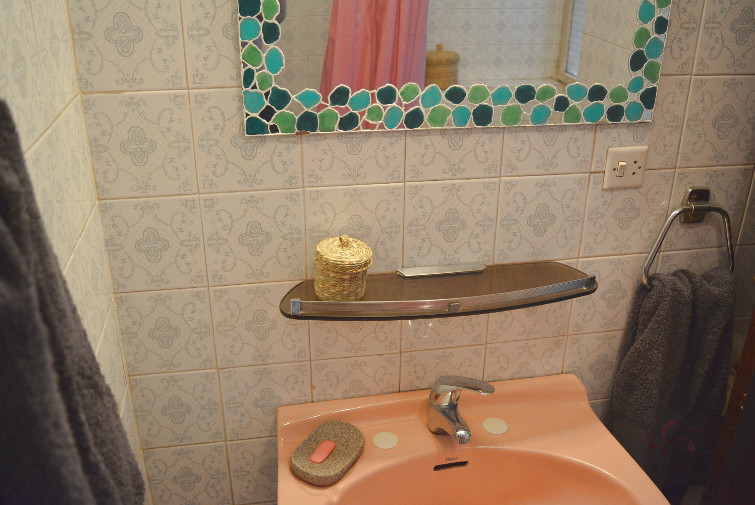
AFTER:
And here it is the "after image" of the bathroom with the customized mirror! :)
DESPUÉS:
Y aquí está la "imagen del después" del baño con el espejo personalizado! :)
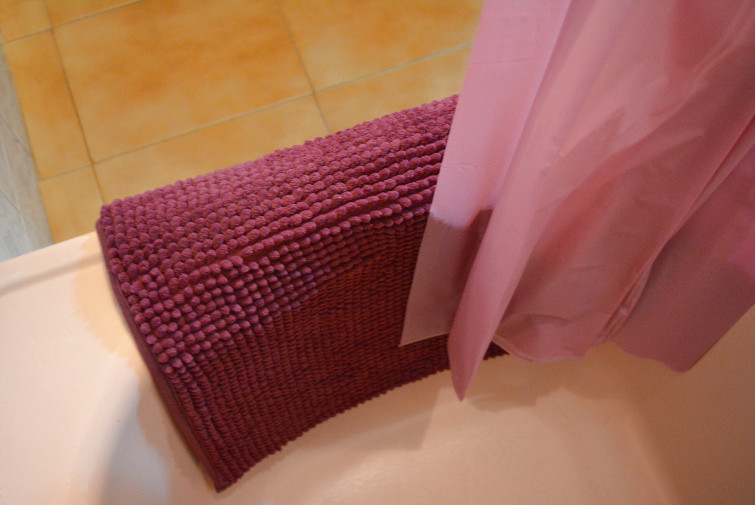
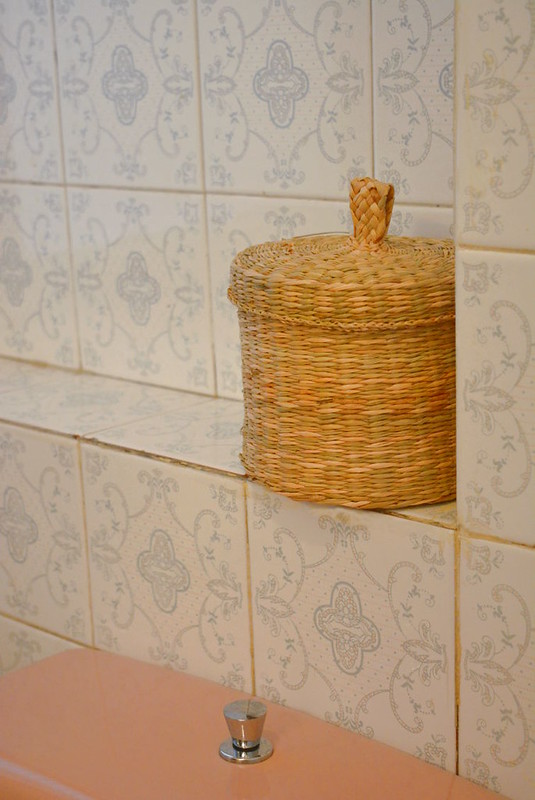
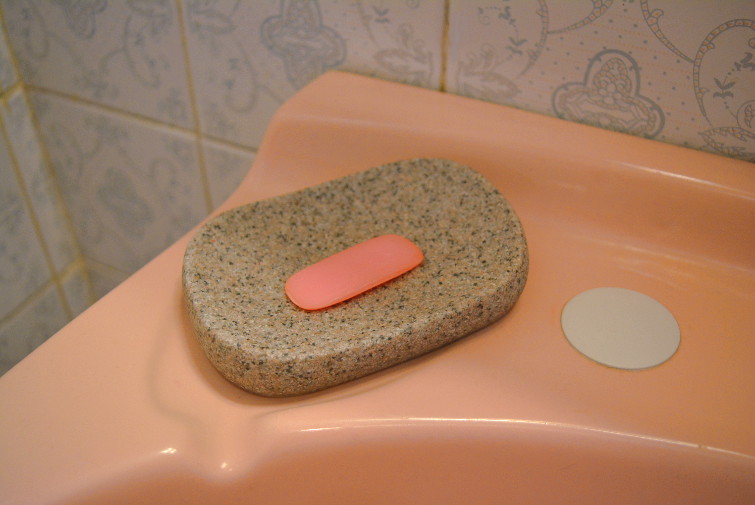
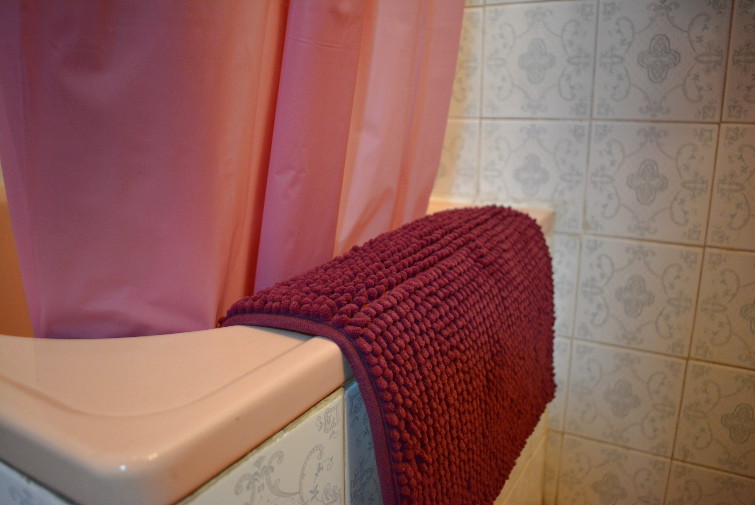
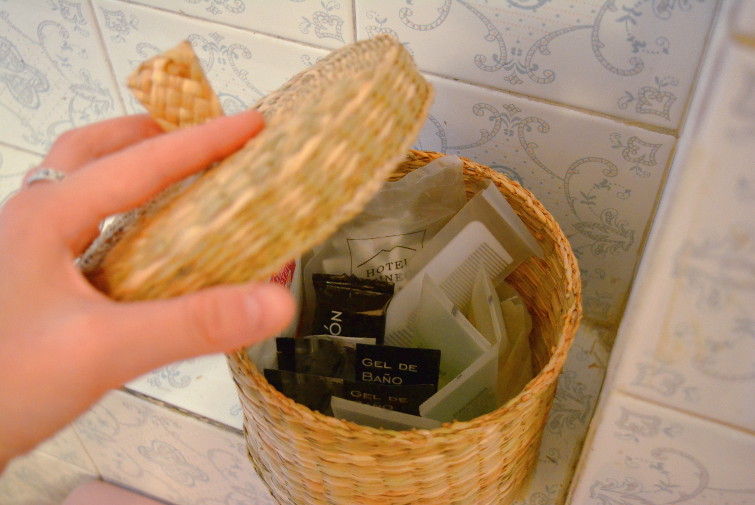
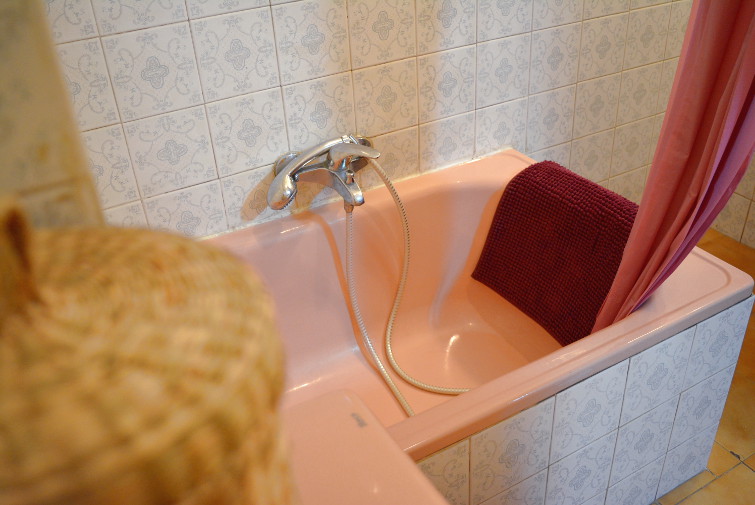
I also changed the old shower curtains for a pair of new magenta ones and a matching rug and to make it more comfortable, cozy and welcoming I also added some extra details: a little stone soap dish and some wicker round boxes in different sizes. The biggest one filled with shower gel, shampoo, a comb, soap, and other bathroom products for the visitors who come over ;)
También cambié las cortinas de ducha antiguas por unas nuevas en color magenta y una alfombrilla a juego y para hacerlo más acogedor y cómodo añadí algunos detalles extra: una pequeña jabonera de piedra y unas cajistas de mimbre de distintos tamaños. La grande la rellené con gel de ducha, champú, un peine, jabón, y demás productos de baño para las visitas que vienen a casa ;)
What do you think about the result? You can see more easy home DIYs here and here. Do you like this kind of posts? Would you like me to show you more DIYs for home that I've tried? I'll be waiting for your feedback! Thanks for being there!! ;)
¿Qué os ha parecido el resultado? Podéis ver más DIYs sencillos aquí y aquí. ¿Os gustaran este tipo de posts? ¿Os gustaría que os enseñase más ideas de DIYs que he hecho para casa? Espero vuestras respuestas! Gracias por estar ahí!! ;)
The maiking-of! hehehe :P / El cómo se hizo! jejjeje :P
It needs definitely patience but the result is worth it. Your "new" mirror looks great. :)
ResponderEliminarP&P style ❤ ☯ ☮ --- DIY --- fashion --- and more --- ☮ ☯ ❤
Thank you so much for sharing your opinion!! I really appreciate it! :)
EliminarMe ha encantado el espejo voy a ver si soy capaz de copiarte la idea .Besitos
ResponderEliminarMuchas gracias Mayka!! Me alegra un montón que te haya gustado esta propuesta! jeje. Ya me contarás qué tal tu experiencia! ;)
Eliminar