Mostrando entradas con la etiqueta Home. Mostrar todas las entradas

viernes, 16 de enero de 2015

DIY: Wall of butterflies

DSC_0040_mod

    Hellooo! At least friday!! :D This week, the return to the routine, has been quite long to me, and you? So today to celebrate the weekend is here, I wanted to show you a very easy and good-looking DIY I made some mothns ago for my home and that you can try in your free time ;)

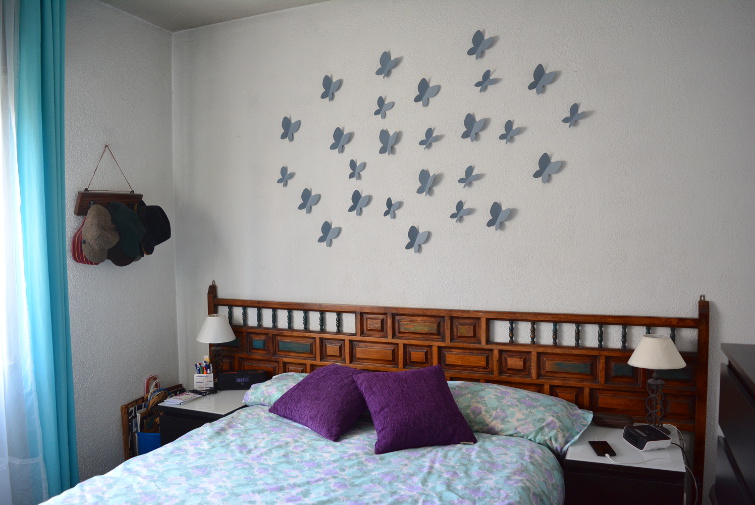
    I wanted to add a decoration over our bed but as we have a very wide headboard adding one big picture or several small ones covering the whole width would turn into an overdecorated room and would give a feeling of a smaller space. That's why I decided to create my own personal decoration with some grey butterflies in different sizes spread over it. I chose grey because it matches the ligth colors of the room and it's dark enough to add a little contrast with our white walls.

    I also wanted to announce that I've created a new tab called "DIY" under the header of the blog, where you can find all the DIYs published here ;) . Now let's go with the step-by-step of this easy DIY!


   Holaaa! Por fin viernes!! :D Esta semana, con la vuelta a la rutina, se me ha hecho bastante larga, ¿y a vosotr@s? Así que hoy para celebrar que el fin de semana ya está aquí, os quería enseñar un sencillo pero muy lucido DIY que hice para mi casa hace unos meses y que podéis probar a hacer en vuestro tiempo libre ;)

    Desde hace tiempo quería añadir una decoración encima de nuestra cama pero como tenemos un cabecero muy ancho, al colocar un cuadro grande o varios cuadros pequeños cubriendo todo el ancho, la habitación quedaría muy recargada dando la sensación de ser más pequeña de lo que es en realidad. Por eso decidí crear mi propia decoración para la pared con algunas mariposas de color gris en diferentes tamaños esparcidas sobre ella. Me decidí por el color gris porque combina con los tonos suaves de la habitación y es suficientemente oscuro para contrastar con nuestras blancas paredes.
 
    Por cierto, aprovecho para comentar que he creado una nueva pestaña de "DIY" bajo la cabecera del blog, donde podréis encontrar todos los DIYs que vaya publicando por aquí ;) . Ahora vamos con el paso a paso de este sencillo DIY!

domingo, 26 de octubre de 2014

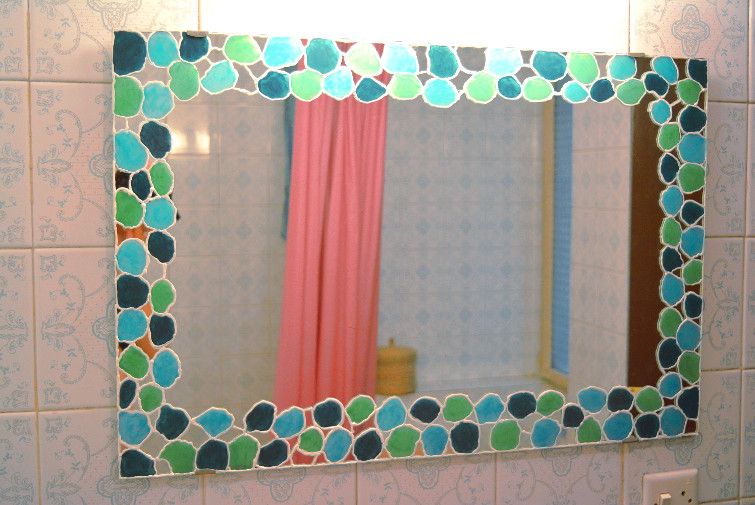
DIY: Stained glass mirror (bath makover)

DSC_0763_mod

    Another one of my hobbies apart from fashion, is doing hand-made things. When I was a little girl, I loved to spend the days or the afternoons doing my own DIYs: bracelets and necklaces, things for my room or to play and even clothes for my dolls! hehe ;) . Now I have less time but from now to then, when I manage to make some time, I turn to DIYs to get some things that I don't find on the stores or al least the way I want them. And that's exactly what happened with this DIY that I show you today.

    I live in an old flat and we have a second bathroom that we didn't use very much because it was smaller that the main one and also not very welcoming. Refurbishing was not an option so I wanted to do some changes on it to make it more comfortable and welcoming. The first thing I wanted to change was the old mirror, but I didn't find any other one on the stores which fitted the space available between the shelf over the sink and the lamp over it and which had a young and fresh style. So I decided to customize the old mirror and turn it into a new coloured up one! :) Want to know how I did it? It's quite simple so keep reading! ;)


    Otra de mis aficiones además de la moda, es hacer manualidades. De niña me encantaba pasarme los días y las tardes haciendo cosas con las manos: pulseras y collares, cosas para mi habitación o para jugar e incluso ropa para mis muñecas! jeje ;) . Ahora tengo menos tiempo pero de vez en cuando, cuando consigo sacar algo de tiempo, recurro a los DIYs par hacer cosas que no encuentro en las tiendas o al menos del modo en que las quiero. Y eso es exactamente lo que ocurrió con este DIY que os enseño hoy.

    Vivo en un piso antiguo y tenemos un segundo baño que no usábamos mucho porque es más pequeño que el principal y además no era muy acogedor. Reformarlo no era una opción así que quería hacer algunos cambios en él para hacerlo más cómodo y acogedor. Lo primero que quería cambiar era el viejo espejo, pero no encontraba ninguno en las tiendas que se adaptara al hueco disponible entre el lavabo y la luz que está encima y que tuviera un estilo fresco y juvenil. Así que decidí personalizar el antiguo espejo y convertirlo en uno nuevo con colorido! :) ¿Queréis saber cómo lo hice? Es bastante sencillo así que seguid leyendo! ;)