
Hellooo! At least friday!! :D This week, the return to the routine, has been quite long to me, and you? So today to celebrate the weekend is here, I wanted to show you a very easy and good-looking DIY I made some mothns ago for my home and that you can try in your free time ;)
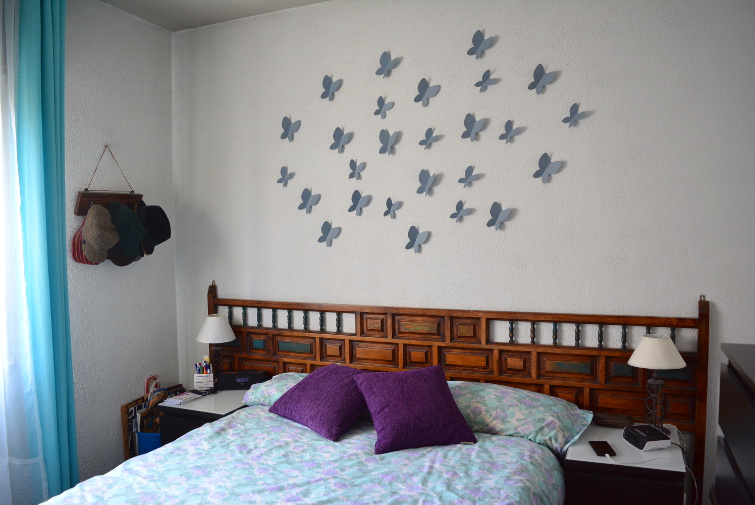
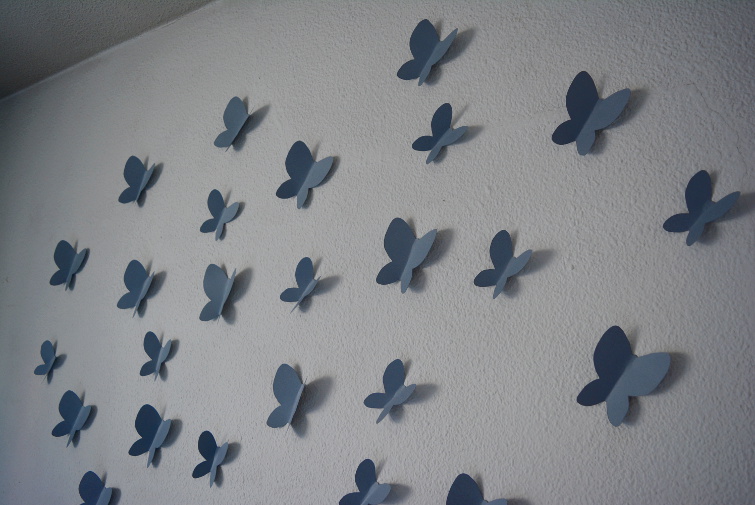
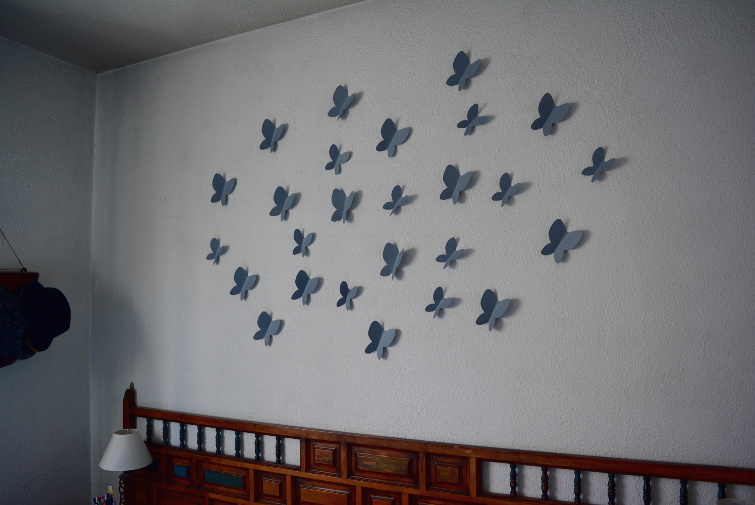
I wanted to add a decoration over our bed but as we have a very wide headboard adding one big picture or several small ones covering the whole width would turn into an overdecorated room and would give a feeling of a smaller space. That's why I decided to create my own personal decoration with some grey butterflies in different sizes spread over it. I chose grey because it matches the ligth colors of the room and it's dark enough to add a little contrast with our white walls.
I also wanted to announce that I've created a new tab called "DIY" under the header of the blog, where you can find all the DIYs published here ;) . Now let's go with the step-by-step of this easy DIY!
Holaaa! Por fin viernes!! :D Esta semana, con la vuelta a la rutina, se me ha hecho bastante larga, ¿y a vosotr@s? Así que hoy para celebrar que el fin de semana ya está aquí, os quería enseñar un sencillo pero muy lucido DIY que hice para mi casa hace unos meses y que podéis probar a hacer en vuestro tiempo libre ;)
Desde hace tiempo quería añadir una decoración encima de nuestra cama pero como tenemos un cabecero muy ancho, al colocar un cuadro grande o varios cuadros pequeños cubriendo todo el ancho, la habitación quedaría muy recargada dando la sensación de ser más pequeña de lo que es en realidad. Por eso decidí crear mi propia decoración para la pared con algunas mariposas de color gris en diferentes tamaños esparcidas sobre ella. Me decidí por el color gris porque combina con los tonos suaves de la habitación y es suficientemente oscuro para contrastar con nuestras blancas paredes.
Por cierto, aprovecho para comentar que he creado una nueva pestaña de "DIY" bajo la cabecera del blog, donde podréis encontrar todos los DIYs que vaya publicando por aquí ;) . Ahora vamos con el paso a paso de este sencillo DIY!
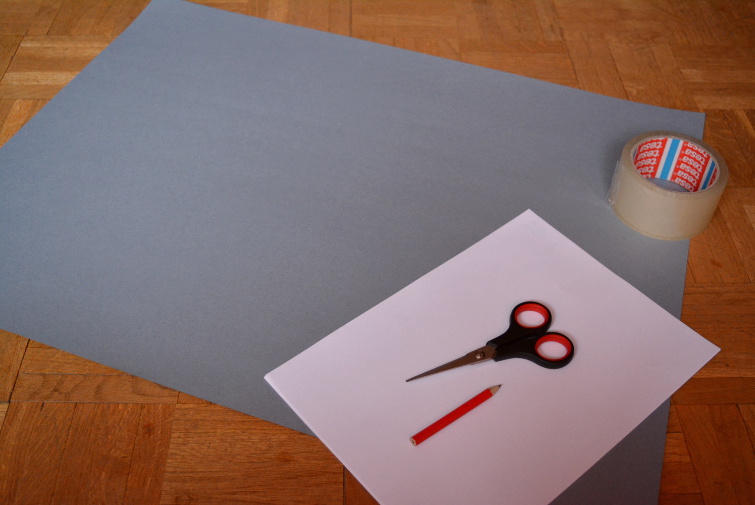
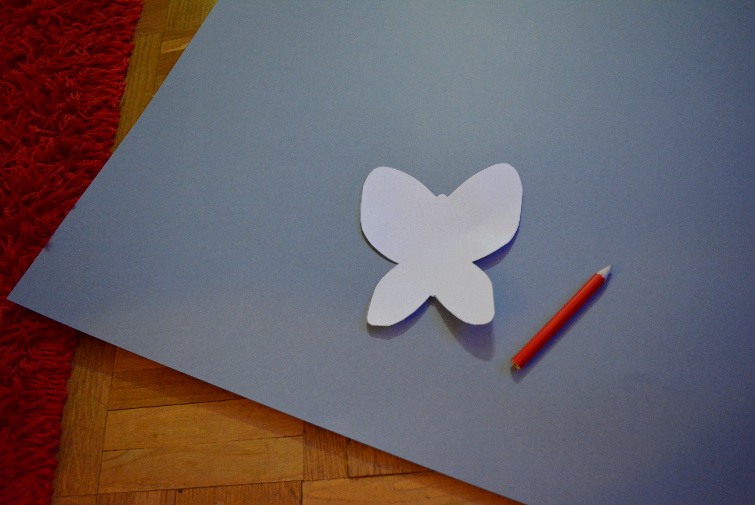
1. First, these are the materials we need: a grey cardboard (or the color you want), a white paper, scissors, a pencil and an adhesive tape.
1. En primer lugar, éstos son los materiales que necesitamos: una cartulina (o del color que queráis), un folio en blanco, tijeras, un lápiz y cinta adhesiva.
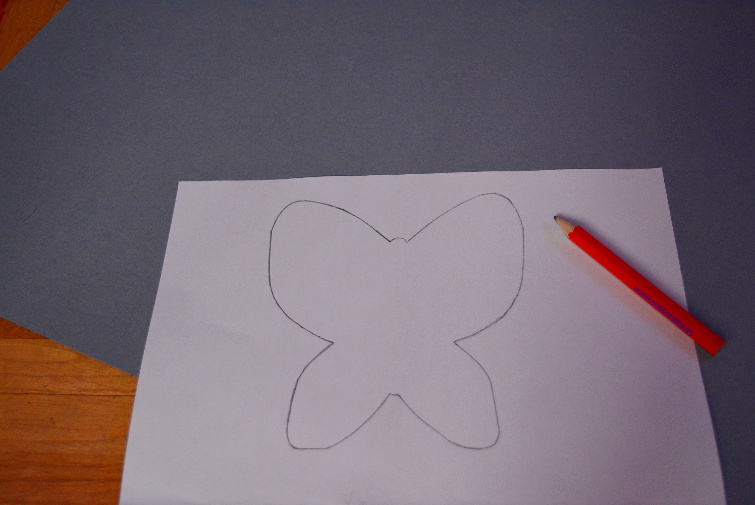
2. We start drawing the outline of a butterfly with the pencil in the white paper.
2. Empezamos dibujando la silueta de una una mariposa en el folio con el lápiz.
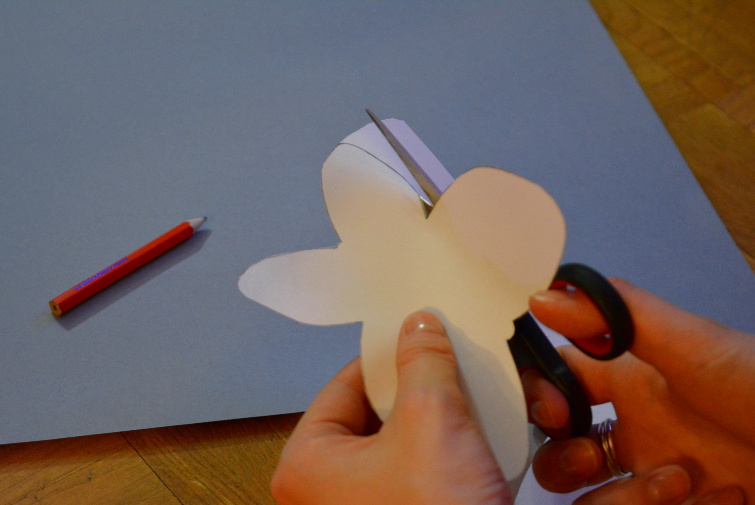
3. Then we cut out the butterfly with the scissors.
3. Después recortamos la mariposa con las tijeras.
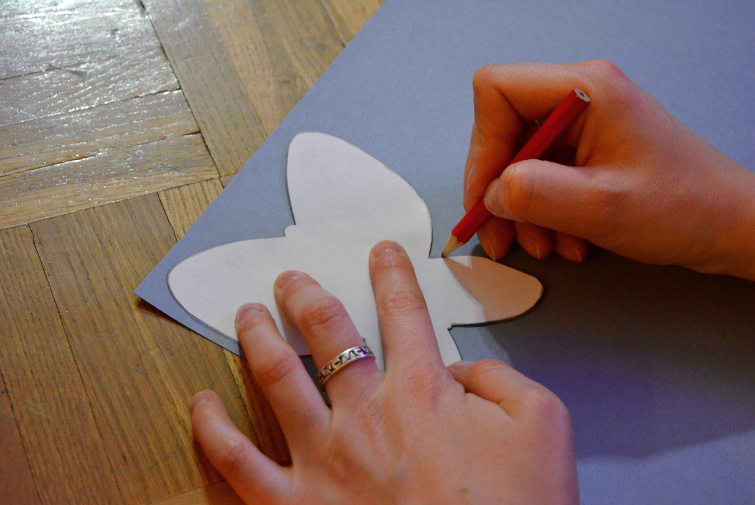
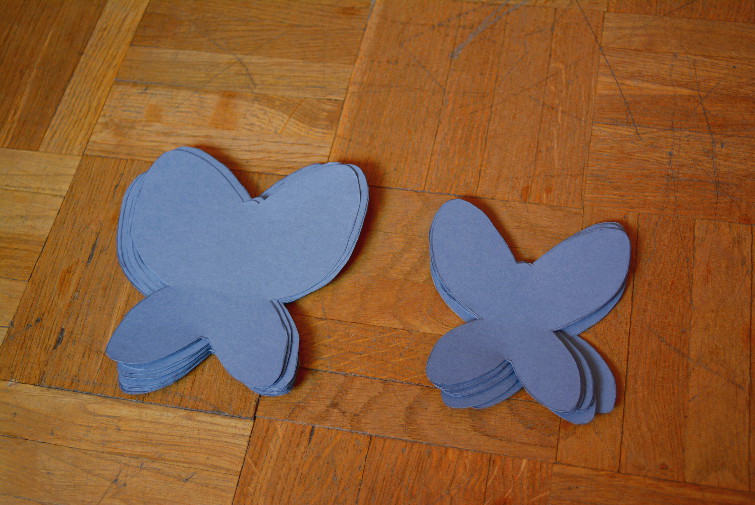
4. Next, we use the paper butterfly as a template to draw more butterflies of the same size on the cardboard.
4. A continuación, utilizamos la mariposa de papel como plantilla para dibujar más mariposas del mismo tamaño en la cartulina.
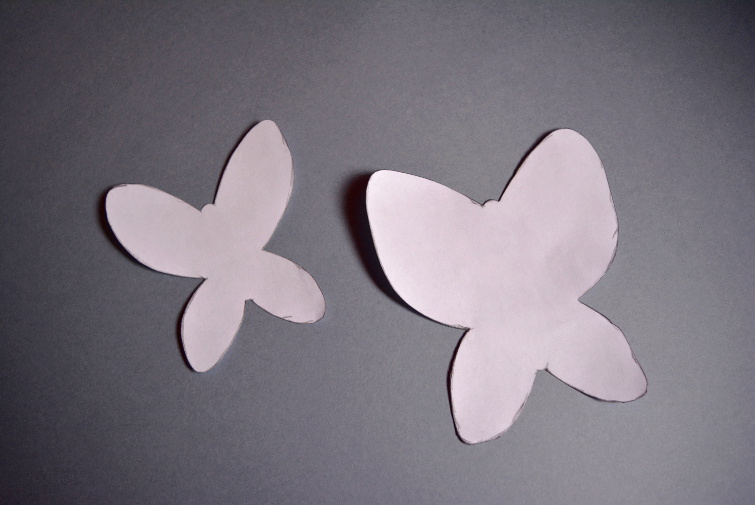
5. If you want two butterflies in two sizes as I did, you just need to draw another smaller butterfly on the paper and repeat the previous steps to create another smaller template.
5. Si queréis mariposas de dos tamaños como yo, sólo tenéis que dibujar otra mariposa más pequeña en el folio y repetir los pasos anteriores para crear otra plantilla con una mariposa más pequeña.
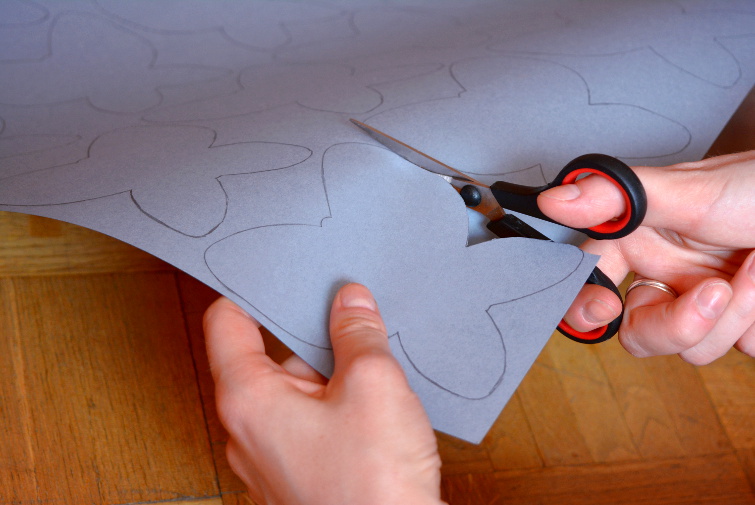
6. Then we cover the whole cardboard with drawings of butterflies using the two templates. I drew more big butterflies but you can distribute them as you like :)
6. A continuación cubrimos toda la cartulina con dibujos de mariposas utilizando ambas plantillas. Yo dibujé más mairposas grandes que pequeñas, pero podéis distribuirlas como os más os guste :)

7. Next we cut out all the butterflies we've drawn on the cardboard.
7. Después recortamos todas las mariposas que hemos dibujado en la cartulina.
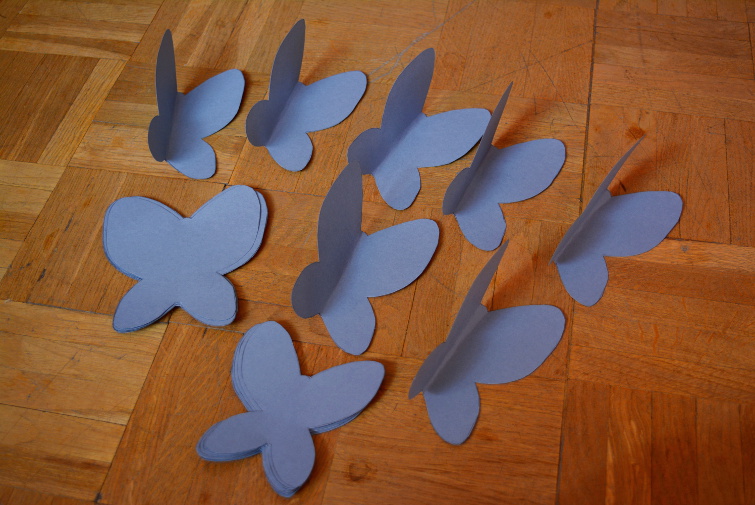
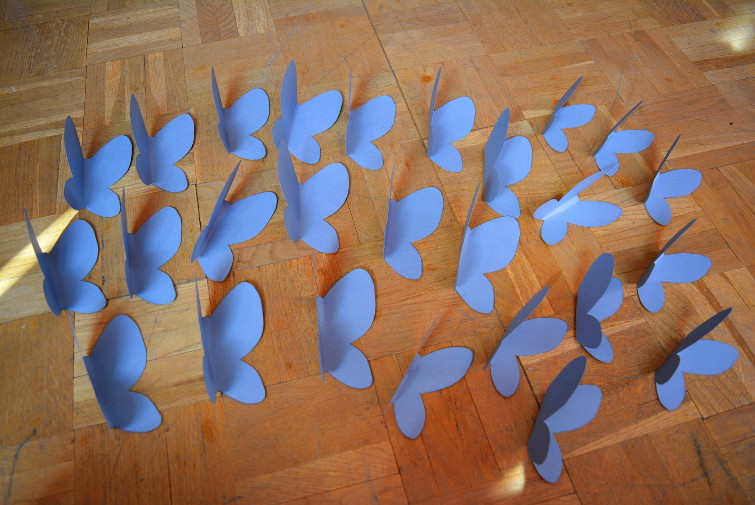
8. To get the "flying" effect, we slightly fold the butterflies by the middle.
8. Para conseguir ese efecto de "estar volando", doblamos ligeramente todas las mariposas por la mitad.


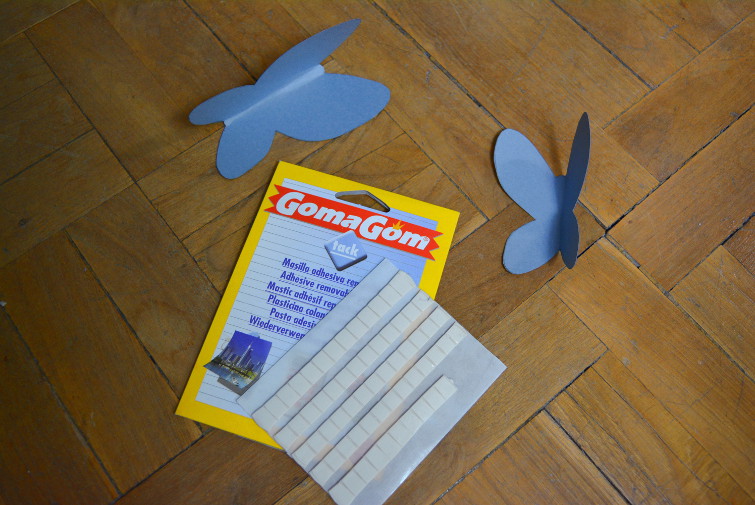
9. Once we have folded all the butterflies, we just need to stick them to the wall. You can use the adhesive tape for this, but as our walls are not flat so the adhesive tape doesn't stik to it, we use an adhesive mastic.
9. Una vez que hayamos doblado todas las mariposas, sólo tenemos que colgarlas de la pared. Para ello podéis utilizar la cinta adhesiva para ello, pero como nuestras paredes no son lisas y por tanto la cinta adhesiva no se pega bien a ellas, yo utilicé una masilla adhesiva.

... and voilà! There we have our butterflies wall! :) What do you think? You can see it's very simple and the result is so cute! hehe. You can also try other shapes instead of butterflies and other colors. Hope you liked this DIY! and if you try it at home, don't doubt in leting me know about your experience! I would love to read about what did you do and share more ideas! ;)
... y voilà! Ya tenemos nuestra pared de mariposas! :) ¿Qué os ha parecido? Podéis ver que es muy sencillo y que el resultado es muy chulo! hehe. También podéis probar con otras formas en vez de mariposas y con otros colores. Espero que os haya gustado este DIY y si os animáis a hacerlo en casa, no dudéis en contrarme vuestra experiencia! Me encantaría leer qué habéis hecho e intercambiar más ideas! ;)
Holaa!!! te ha quedado muy chulo!! Feliz domingo!! besitos de.
ResponderEliminarhttp://cuestionde-estilo.blogspot.com.es/
Muchas gracias Bea!! Qué bien que te guste!! :D
EliminarFeliz domingo a ti también! Besos!!
Me ha gustado mucho el DIY,te ha quedado super-guay
ResponderEliminarMuchísimas gracias Carmen!! Me hace mucha ilusión! :D
Eliminar